Plant-based milks have exploded in popularity worldwide, with options like almond, oat, soy, and coconut milk dominating supermarket shelves. But while convenient, store-bought cartons often contain added sugars, gums, preservatives, and stabilizers that many people would rather avoid. On top of that, the cost of regularly buying vegan milk can add up—especially if you’re a daily coffee drinker or smoothie lover.
That’s where homemade vegan milks come in. With just a handful of pantry staples—nuts, seeds, grains, or legumes—you can create fresh, preservative-free, and customizable plant-based milks in your own kitchen. Better yet, DIY vegan milk lets you flavor them exactly as you like, whether you’re craving a vanilla-almond latte base, chocolate oat milk, or spiced cashew milk for winter nights.
This comprehensive guide explores everything you need to know: the basics of making vegan milk, step-by-step recipes for different types, flavor variations, nutritional insights, troubleshooting tips, and storage hacks. By the end, you’ll be ready to replace expensive cartons with your own creamy, delicious creations.
Chapter 1: The Basics of Vegan Milk Making
1.1 Essential Equipment
Making vegan milk doesn’t require fancy tools, but a few kitchen basics make the process smoother:
Blender: A high-speed blender is ideal for breaking down nuts and grains. Standard blenders work too but may require longer blending.
Nut Milk Bag / Cheesecloth: Used to strain pulp for smooth milk. A fine mesh sieve works in a pinch.
Glass Jars / Bottles: For storage, preferably airtight.
Optional: A frother for coffee drinks, mason jars for flavor infusion.
1.2 The Basic Ratio
Most vegan milk recipes follow a simple ratio:
1 cup nuts, seeds, or grains
3–4 cups filtered water
This ratio produces a creamy yet versatile texture. For thicker milk (great for coffee or desserts), reduce water slightly. For lighter milk, increase water.
1.3 Steps to Make Any Vegan Milk
Soak (if required): Nuts and seeds like almonds, cashews, or sunflower seeds benefit from soaking (4–12 hours) to soften and enhance digestibility. Grains like oats may need rinsing to avoid sliminess.
Blend: Combine the soaked ingredient with water in a blender. Blend until smooth.
Strain: Pour through a nut milk bag or cheesecloth to remove pulp (optional for oat or hemp milk).
Flavor: Add natural sweeteners (dates, maple syrup), vanilla, cocoa, or spices.
Store: Refrigerate in airtight glass jars for 3–5 days. Shake before use, as separation is natural.
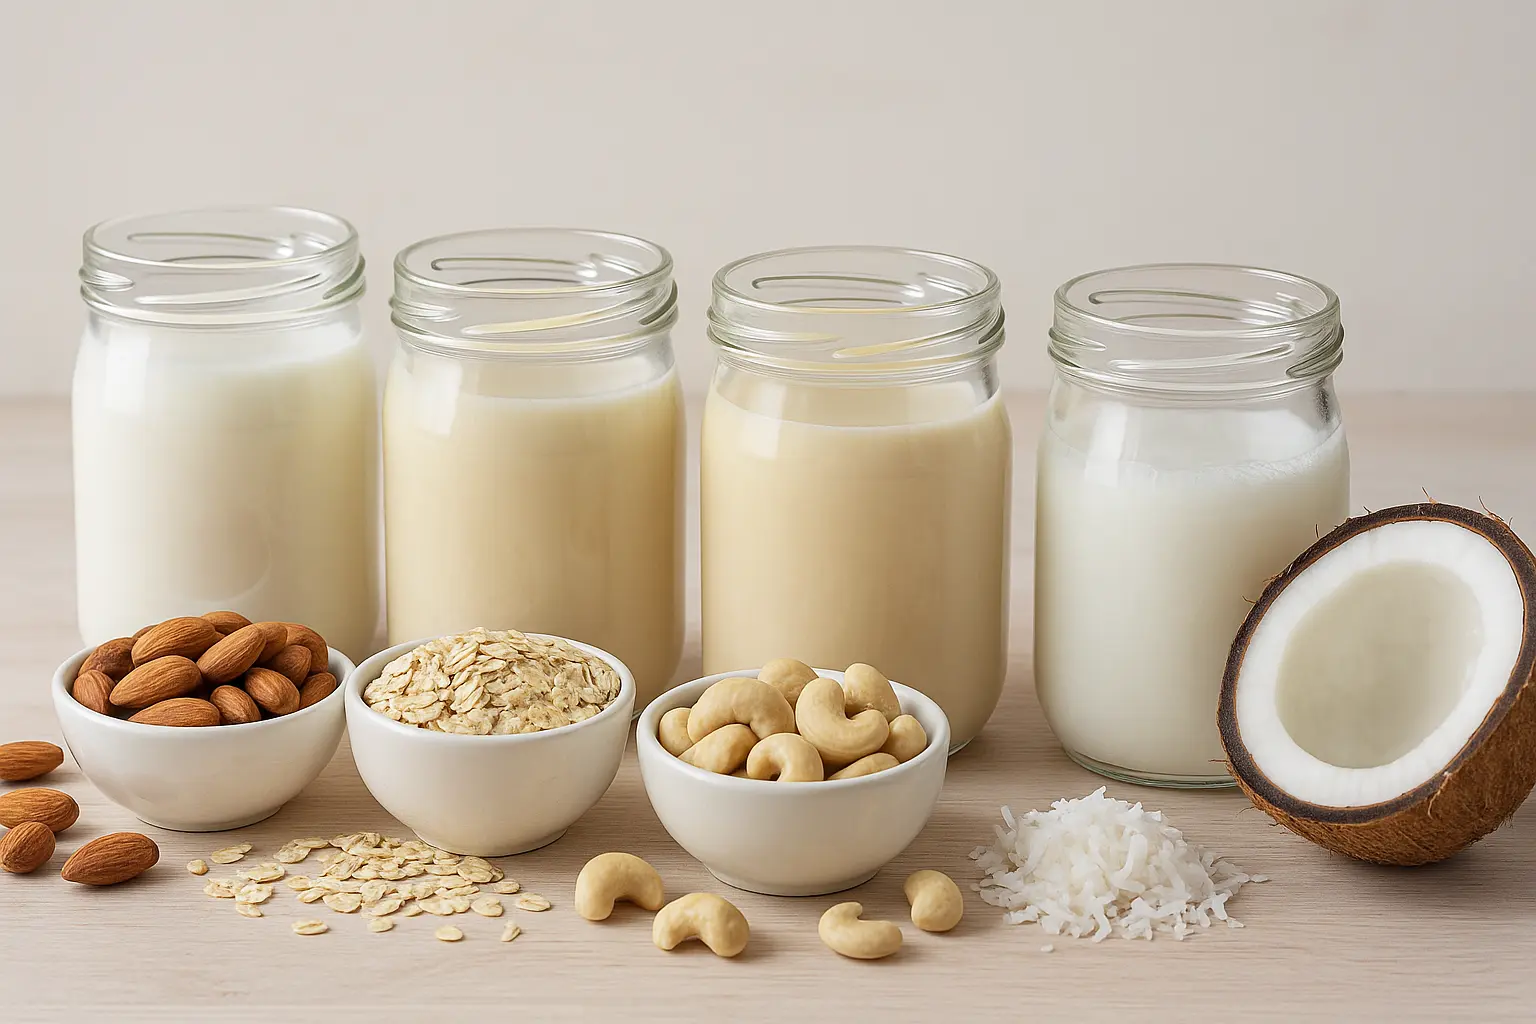
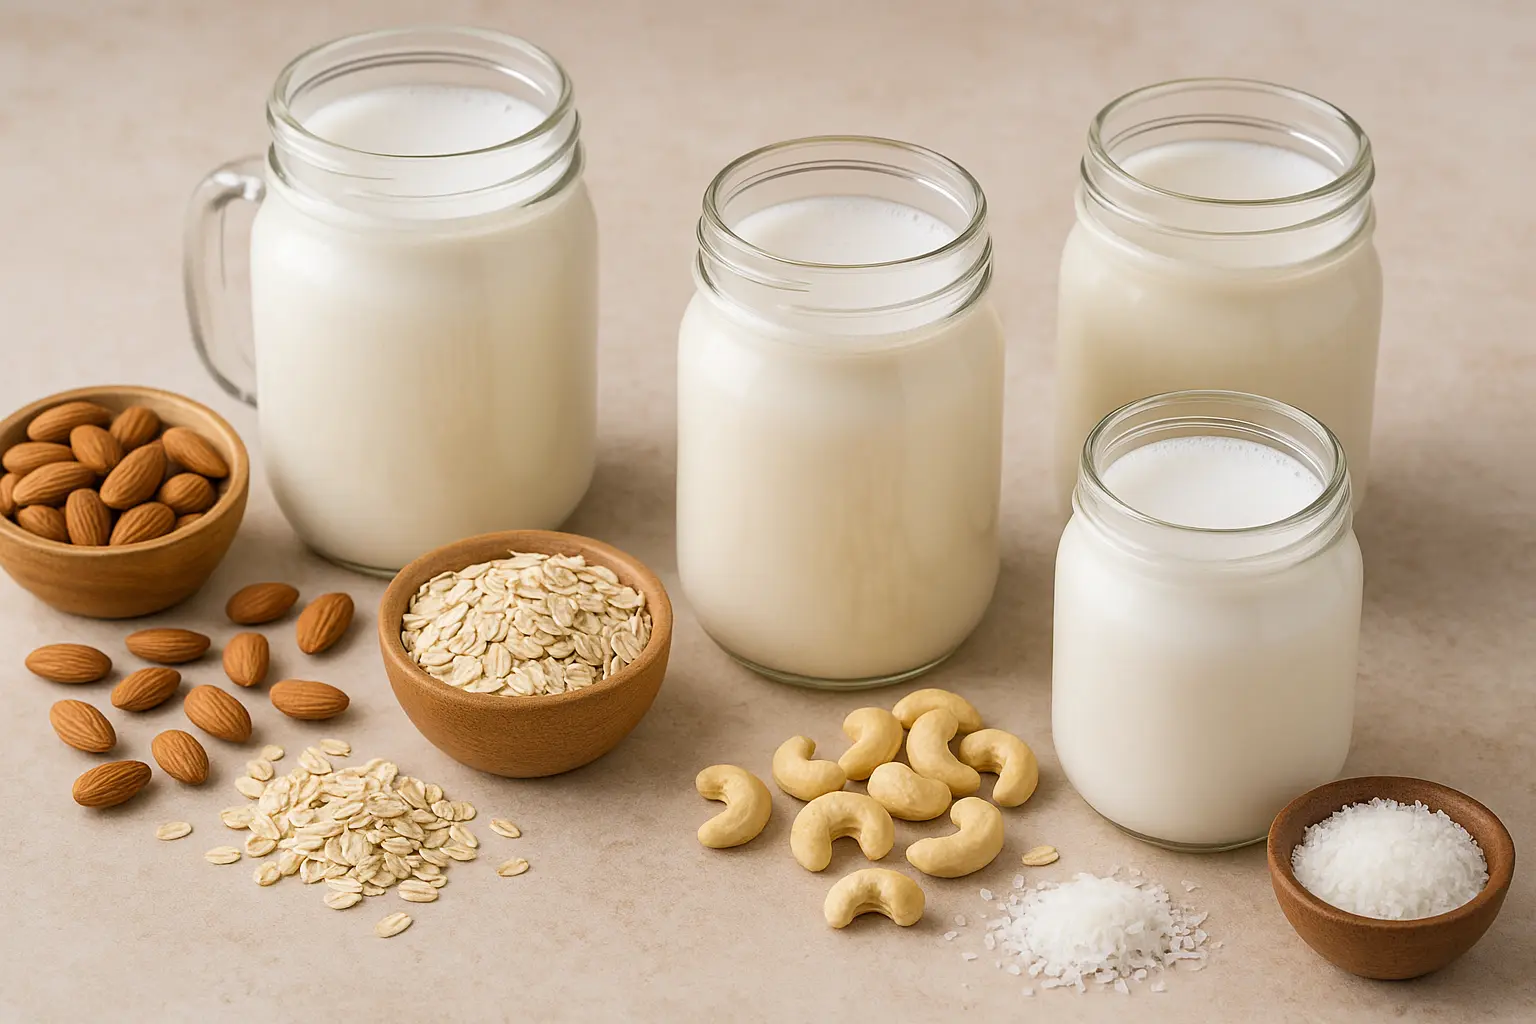
Chapter 2: Popular DIY Vegan Milks (Base Recipes)
2.1 Almond Milk
Ingredients:
1 cup raw almonds (soaked overnight)
4 cups filtered water
Pinch of salt
Method:
Blend soaked almonds with water until smooth.
Strain through a nut milk bag.
Store chilled.
Why Almond Milk?
Light, nutty flavor; low-calorie; versatile in coffee, smoothies, and baking.
2.2 Oat Milk
Ingredients:
1 cup rolled oats
4 cups cold water
Pinch of salt
Method:
Rinse oats thoroughly to reduce slime.
Blend with water for 30–40 seconds.
Strain quickly through cheesecloth.
Why Oat Milk?
Creamy texture, naturally sweet, environmentally friendly. Great for lattes.
2.3 Cashew Milk
Ingredients:
1 cup raw cashews (soaked 4–6 hrs)
4 cups water
Pinch of salt
Method:
Blend soaked cashews with water.
Strain (optional; cashews blend smoothly).
Why Cashew Milk?
Ultra-creamy, rich texture, blends seamlessly without pulp waste.
2.4 Coconut Milk
Ingredients:
1 cup unsweetened shredded coconut
3 cups hot water
Method:
Blend coconut with hot water.
Strain and press for creamy milk.
Why Coconut Milk?
Rich, tropical flavor; excellent in curries, desserts, and smoothies.
2.5 Rice Milk
Ingredients:
1 cup cooked white rice
4 cups water
1–2 dates (optional for sweetness)
Method:
Blend rice with water until smooth.
Strain if needed.
Why Rice Milk?
Light, allergy-friendly, budget-friendly.
2.6 Hemp Seed Milk
Ingredients:
1 cup hemp seeds (shelled)
4 cups water
Method:
Blend seeds and water until smooth.
Strain (optional).
Why Hemp Milk?
High in omega-3s, nutty flavor, no soaking required.
Chapter 3: Flavoring Your Vegan Milk
One of the best parts of making DIY vegan milk is the creative flavor options.
3.1 Sweet Flavors
Vanilla Almond Milk: Add 1 tsp vanilla extract + 1 tbsp maple syrup.
Chocolate Oat Milk: Add 1 tbsp cocoa powder + 1–2 dates.
Cinnamon Cashew Milk: Add 1 tsp cinnamon + a pinch of nutmeg.
3.2 Savory & Spiced Flavors
Golden Turmeric Milk: Add ½ tsp turmeric + ¼ tsp cinnamon + pinch of black pepper.
Chai-Spiced Milk: Blend with cardamom, cinnamon, ginger, and cloves.
3.3 Seasonal Twists
Pumpkin Spice Almond Milk: Add pumpkin purée + pumpkin spice blend.
Strawberry Coconut Milk: Blend with fresh or frozen strawberries.
Mint Chocolate Hemp Milk: Add fresh mint leaves + cocoa powder.
Chapter 4: Nutritional Benefits
4.1 Almond Milk
Low-calorie, rich in vitamin E, but lower protein.
4.2 Oat Milk
Contains fiber, beta-glucan (good for cholesterol), naturally sweet.
4.3 Cashew Milk
Creamy, high in minerals (magnesium, zinc).
4.4 Coconut Milk
Energy-dense, provides medium-chain triglycerides (MCTs).
4.5 Rice Milk
Easily digestible, allergy-friendly.
4.6 Hemp Milk
Rich in omega-3 and omega-6 fatty acids, protein-rich.
Chapter 5: Storage, Shelf-Life & Safety
Store in sterilized glass jars for best results.
Keep refrigerated (3–5 days).
Shake before use—separation is natural.
Freeze in ice cube trays for longer storage.
Tip: Label jars with the date of preparation to track freshness.
Chapter 6: Zero-Waste Tips
Use Pulp: Don’t discard nut/oat pulp. Repurpose in baking (cookies, muffins), smoothies, or as a base for energy bites.
Compost: If not using, compost the pulp.
Make Flour: Dry almond pulp, grind into almond flour.
Chapter 7: Cost & Sustainability Benefits
Cost Savings: Store-bought almond milk in Australia costs around $3–4 per liter, while homemade costs less than $1.50.
Eco-Friendly: Reduces packaging waste, plastic cartons, and transport emissions.
Customization: Tailor thickness, sweetness, and flavors to your needs.
Chapter 8: Common Troubleshooting
Slimy Oat Milk? Use cold water, quick blending, thorough rinsing.
Bland Taste? Add a pinch of salt, natural sweeteners, or vanilla.
Too Thin? Reduce water-to-ingredient ratio.
Separation? Normal—shake before use.
Chapter 9: When to Use Vegan Milks
Coffee & Lattes: Best with oat, soy, or cashew for frothing.
Baking: Almond and soy work well as 1:1 milk substitutes.
Smoothies: Coconut, oat, and hemp add creaminess.
Savory Dishes: Cashew milk is perfect for creamy sauces.
Chapter 10: Meal Prep & Lifestyle Integration
Prep 2–3 jars weekly for consistent supply.
Match flavors with meals: vanilla almond milk for granola, spiced cashew milk for evening wind-down, coconut milk for curries.
Batch-freeze pulp recipes for quick snacks.
Conclusion: The Joy of Homemade Vegan Milks
Making vegan milk at home isn’t just a recipe—it’s a lifestyle shift. It saves money, reduces waste, improves nutrition, and gives you creative control. Whether you stick to a simple almond milk or experiment with exotic flavors like chai cashew or strawberry coconut, you’ll enjoy fresher, cleaner, and tastier plant-based milks than anything from a carton.
Soak, blend, strain, flavor, and enjoy—DIY vegan milks are the future of sustainable, delicious living.

Leave a comment
Your email address will not be published. Required fields are marked *